

Thursday, March 29, 2012
Smaller Batmobile miata concept
I worked up a concept for a slimmer miata-batmobile that would use the stock hood, fenders and headlights, sort of based on the Batman New Adventures batmobile:

Test-mounted the Front
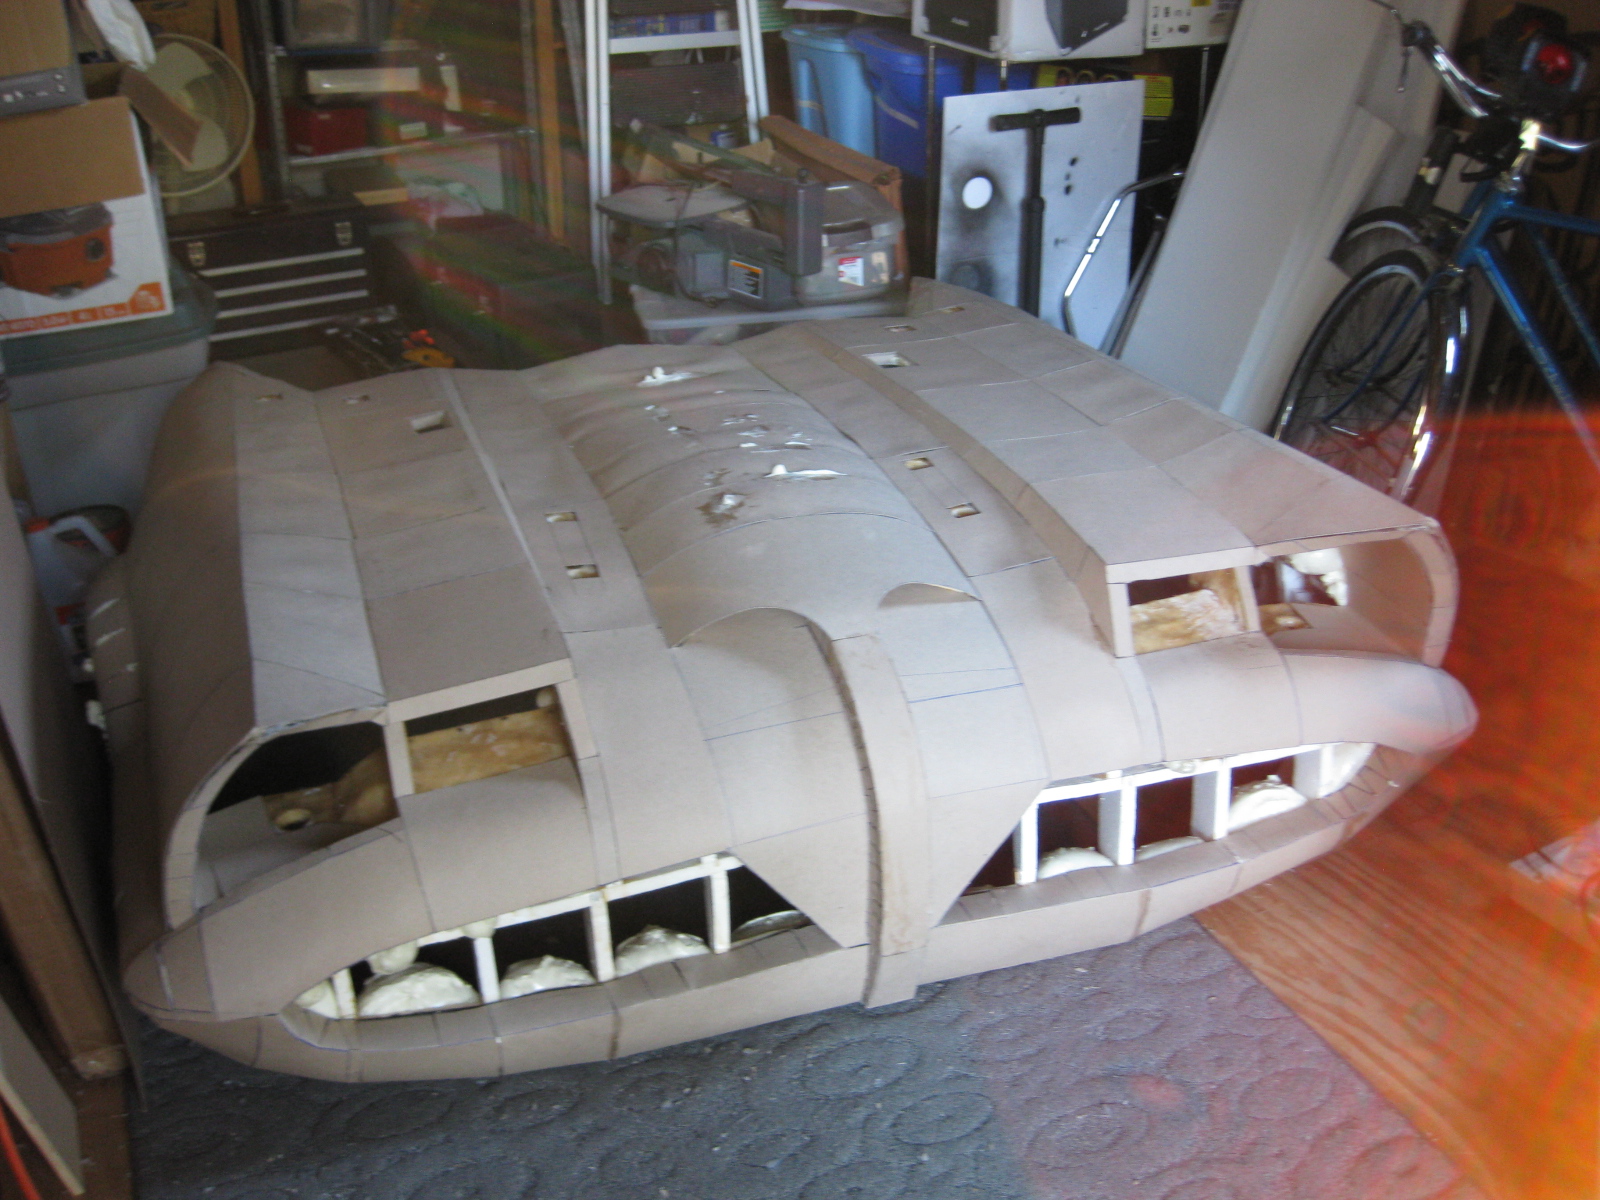
I test mounted the front half of my DIY Batmobile. After quite a struggle, I got it bolted on good and tight and drove around with half of a Batmobile for a full week!


 Unfortunately, after a huge rainstorm a quantity of moisture got trapped underneath the skin and mushified some of the body panels. What's more, the front is impractical in its heavyness, and I was unable to open the hood with it mounted like I'd planned. The miata is often thirsty for oil, so no motor access is a big problem.
Now I have to decide whether to band-aid the damage and then wrap the whole thing in aluminum and black duct tape as a desperate measure to give it some form of weatherproofing, OR, whether I should smooth out the sculpt with mass amounts of spackle and have the whole thing sprayed with a hard shell of fiberglass (then tear out the cardbord foam and spackle from the insides.)
I'm not sure what to do, and more than a little tired and discouraged.
What's more, the Batmobile is apparently a huge dude magnet.
On three occasions over the course of one week, men pulled over to gawk and interview me about what I'd done. It has been proposed by Batman himself that 'Chicks dig the car,' but I think he is in great error on that point.
Friday, March 9, 2012
Choro-Q Coffee Can Batmobiles
I finally got my Choro-Q Batmobiles from Japan in the mail yesterday! I was waiting for weeks on the shipping. They originally came as a free premium on top of cans of 'Boss' coffee. They have a magnet built into the bottom so they can drive around and around the steel coffee can.

They made one of each movie Batmobile to promote the Japan Blue Ray release of all the Batman movies. There's no 66, though. What a shame!

These are the most perfect Batmobile toys in the world.


Though not DIY, I do plan to include Super-Deformed, wonky, weird or strange Batmobiles here on The Batmobile Show. And any from Japan.
Tuesday, February 28, 2012
Rear Concept
This weekend I tore down the front and back bumpers on the miata and installed trailer-wiring harnesses so that all the lights on the Batmobile will be plug-and-play.
A while ago I bought some Thunderbird tail-lights (1959 and 1961, respectively) to use for the Batmobile's rear lights and rocket exhaust. Today I dummied up a design concept in Photoshop of what I want the rear to look like:
Before Batification:
 After:

How I'll get into the trunk or fill the gas, I don't know.
A while ago I bought some Thunderbird tail-lights (1959 and 1961, respectively) to use for the Batmobile's rear lights and rocket exhaust. Today I dummied up a design concept in Photoshop of what I want the rear to look like:
Before Batification:


How I'll get into the trunk or fill the gas, I don't know.
Saturday, February 25, 2012
1966 / 1989 Batmobile Combo
A man can never love only one Batmobile.
I've been particularly obsessed with all the different Batmobiles recently.
I got up this morning (Saturday) at 8:15 AM and said, "I want to draw a hybrid of the 1966 and 1989 Batmobiles." So I did:
 I like it!
I've been particularly obsessed with all the different Batmobiles recently.
I got up this morning (Saturday) at 8:15 AM and said, "I want to draw a hybrid of the 1966 and 1989 Batmobiles." So I did:

Up To Date
And here we are at the first pic I posted. Here it is with a little Photoshopping to show what the red stripes do for it:
 Next I have to build the wiring harness, plug it in, bolt this thing on and see if I can actually drive around without the whole thing breaking apart. Exciting!

01-15-12
Here's the black Batmobile on the front of the miata for the first time:

Now I need to work to get the thing actually bolted on. I bought a scrap miata hood and took the grinder to it:


12-17-2011
I decided to switch from Bondo to spackle, mostly due to my sensitivity issue. I tried different spackles, and settled on 'Ready Patch', which is oil based and hardens up really well.
I did a couple of light layers of spackle. I might do more spackling once the front half is mounted onto the car.


I decided to switch from Bondo to spackle, mostly due to my sensitivity issue. I tried different spackles, and settled on 'Ready Patch', which is oil based and hardens up really well.
I did a couple of light layers of spackle. I might do more spackling once the front half is mounted onto the car.


BAT 01
12-15-11
Well here's a nice piece of progress.
I got a custom Blackplate license plate! BAT 01 was previously taken, but I randomly did a search on the plate site one day and it was available, so I snatched it up then and there. I registered it for ten years. I used my old license plates to make black-out frames.   |


12-15-11
I sanded down all the buldged high spots. This created some burn-through and holes in the chipboard, which I sealed up with super-glue. I then painted the entire thing with two layers of polyester resin. (I suffered a few days of itchy/crawly skin from this, despite trying to minimize exposure, using layered clothing, full face respirator, barrier cream, etc., etc.)


I sanded down all the buldged high spots. This created some burn-through and holes in the chipboard, which I sealed up with super-glue. I then painted the entire thing with two layers of polyester resin. (I suffered a few days of itchy/crawly skin from this, despite trying to minimize exposure, using layered clothing, full face respirator, barrier cream, etc., etc.)


10-03-11
I got a bunch of cans of spray foam to fill in the skeleton behind the panels and keep them from warping any more - bad idea! The pressure from the spray foam warped every panel that wasn't warped already, and oozed out the cracks. Dang!

I hacked back the wild foam jungle, and replaced the worst bulged panels:


07-16-11
I attached the first twelve fiberglass-backed panels on the front - they were fiddly, lumpy, and didn't come out as nice as I'd hoped. What's worse, my allergic reaction to polyester resin seemed to be getting worse.

Because of those difficulties, I decided to 'skin' the front with plates of chipboard.

06-15-11
I decided to reinforce the skeleton with a grid of fiberglass and carbon fiber tape, all glued up with polyester resin. After a few long sessions of working with the nasty nasty toxic stinky polyester resin, my skin was all itchy/rashy feeling, despite wearing a full face respirator, a tyvek suit, nitrile gloves and barrier cream. I'm allergic to something in the stuff. I seem to be allergic or sensitized to most hardcore chemicals, which makes many stages of building a DIY batmobile miserable.


I decided to reinforce the skeleton with a grid of fiberglass and carbon fiber tape, all glued up with polyester resin. After a few long sessions of working with the nasty nasty toxic stinky polyester resin, my skin was all itchy/rashy feeling, despite wearing a full face respirator, a tyvek suit, nitrile gloves and barrier cream. I'm allergic to something in the stuff. I seem to be allergic or sensitized to most hardcore chemicals, which makes many stages of building a DIY batmobile miserable.


05-15-11
I built 'mounting pods' to bolt the Batmobile to the miata hood:


I built 'mounting pods' to bolt the Batmobile to the miata hood:

While making some test pieces, I discovered that I'm allergic to epoxy resin, which I planned to use to finish this thing.
I decided to switch to polyester resin.
Since polyester resin will eat the foam, I painted the skeleton with two coats of Elmer's glue to protect it:


Subscribe to:
Posts (Atom)